How to take good photos
Photography is a powerful art form. I think of photography as like a jigsaw puzzle. You have to find various pieces that fit together to create something visually amazing. Photos capture stories.
Trust your histogram – this is a useful tip to follow as your histogram can help with accuracy. The human eye can trick us into thinking photos looks better than it does on a computer. It helps to refer to your histogram so you have the right balance.
Angles are important in photos
Don’t be afraid to explore different angles. Moving just a few centimetres can alter a photo and help it look more professional. Rearranging your props can also help you achieve a better shot. Explore the space you have.
</
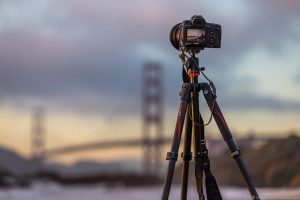
 Tripods make a difference – tripods are a great tool to have. They enable you to have long exposure for better shots. There are 3 basic camera movements:
- Pan – is shifting your focus from one side of the screen to the other. The best way to achieve a smooth pan, is to apply little pressure on the pan handle/head for the horizontal shot. This will help avoid shaking and sudden stops in your shots.
- Tilt-is shifting your focus but vertically. Tilt is a little tricky because cameras have a natural centre of gravity when fixed to a tripod (especially heavier cameras). Remember to have a very loose grip to easily achieve an up and down movement. Set your point of focus prior to using both camera movements to get smooth shots.
- Zoom -is using the body of your camera to create movement without moving your tripod. Placing your thumb and middle finger around the lens will give you more control of the shot. You can use markers such as Gaff Tape (which is used on film sets) which is useful to mark your point of focus.
It could be useful to use still shots if you’re a beginner. Still shots are easier to learn first. Maybe throw in some tripod movements once you become confident with these basic movements.
- Unbalanced images – this is touching on moving around. You can take a great shot but be mindful of certain elements in your photo being dominant. For example: a shot of mountains would look good with the right exposure, aperture, angle etc. If this shot is mostly made up of blue sky, this would be the dominant subject. This would put the point of focus on the sky rather than the mountains.
Think about what is dominant and the purpose. Too much will confuse the story behind the photo.
- Unappealing foregrounds – the dominant subject is welcome in this area of photography. People will often try and achieve good shots when they find something interesting. How you execute the shot is important. It is useful to establish the dominant subject because this will bring more structure to the shot.
Diagonal lines contribute to aesthetics in photography. This could really help bring further structure by guiding the focus towards the dominant subject.
- Ineffective lighting – lighting is a very important aspect of photography and film making. Darkness is our enemy.
For example: in a shot of woodlands, natural sunlight would provide great definition. Sunlight would bounce off the eccentric shape of each branch. You will get a different look at certain times of the day. Small changes to lighting will have a huge effect on your photos.
- Cluttered images – an image can get overcrowded pretty quickly. Having several dominant subjects will confuse the main point of focus.
For example: a shot with a horse, river, sunset, country road and cliff would certainly be a perfect example. All of these elements could make perfect shots individually. Remember ‘less is more.
Another great guide to photography, specifically for social media photos can be found here.
Exploring camera settings
Canon has created a cool exposure exercise that you can try out. Test your skills and learn with there fun and educational creative zone here.
As a video production company in London, we often get asked how much it would cost to produce a video ourselves. The truth is, with the right equipment and some know-how, you can save a lot of money by creating your own videos. Of course, there is an initial investment involved in purchasing the necessary equipment.
However, once you have your own set-up, the sky is the limit in terms of what you can create. And if you’re willing to put in the time to learn the ropes, you can start producing high-quality videos that will save you money in the long run. So if you’re looking to create video content on a budget, don’t be afraid to go DIY. With a little effort, you can create professional-grade videos that will help you save money and reach your target audience.


Recent Comments